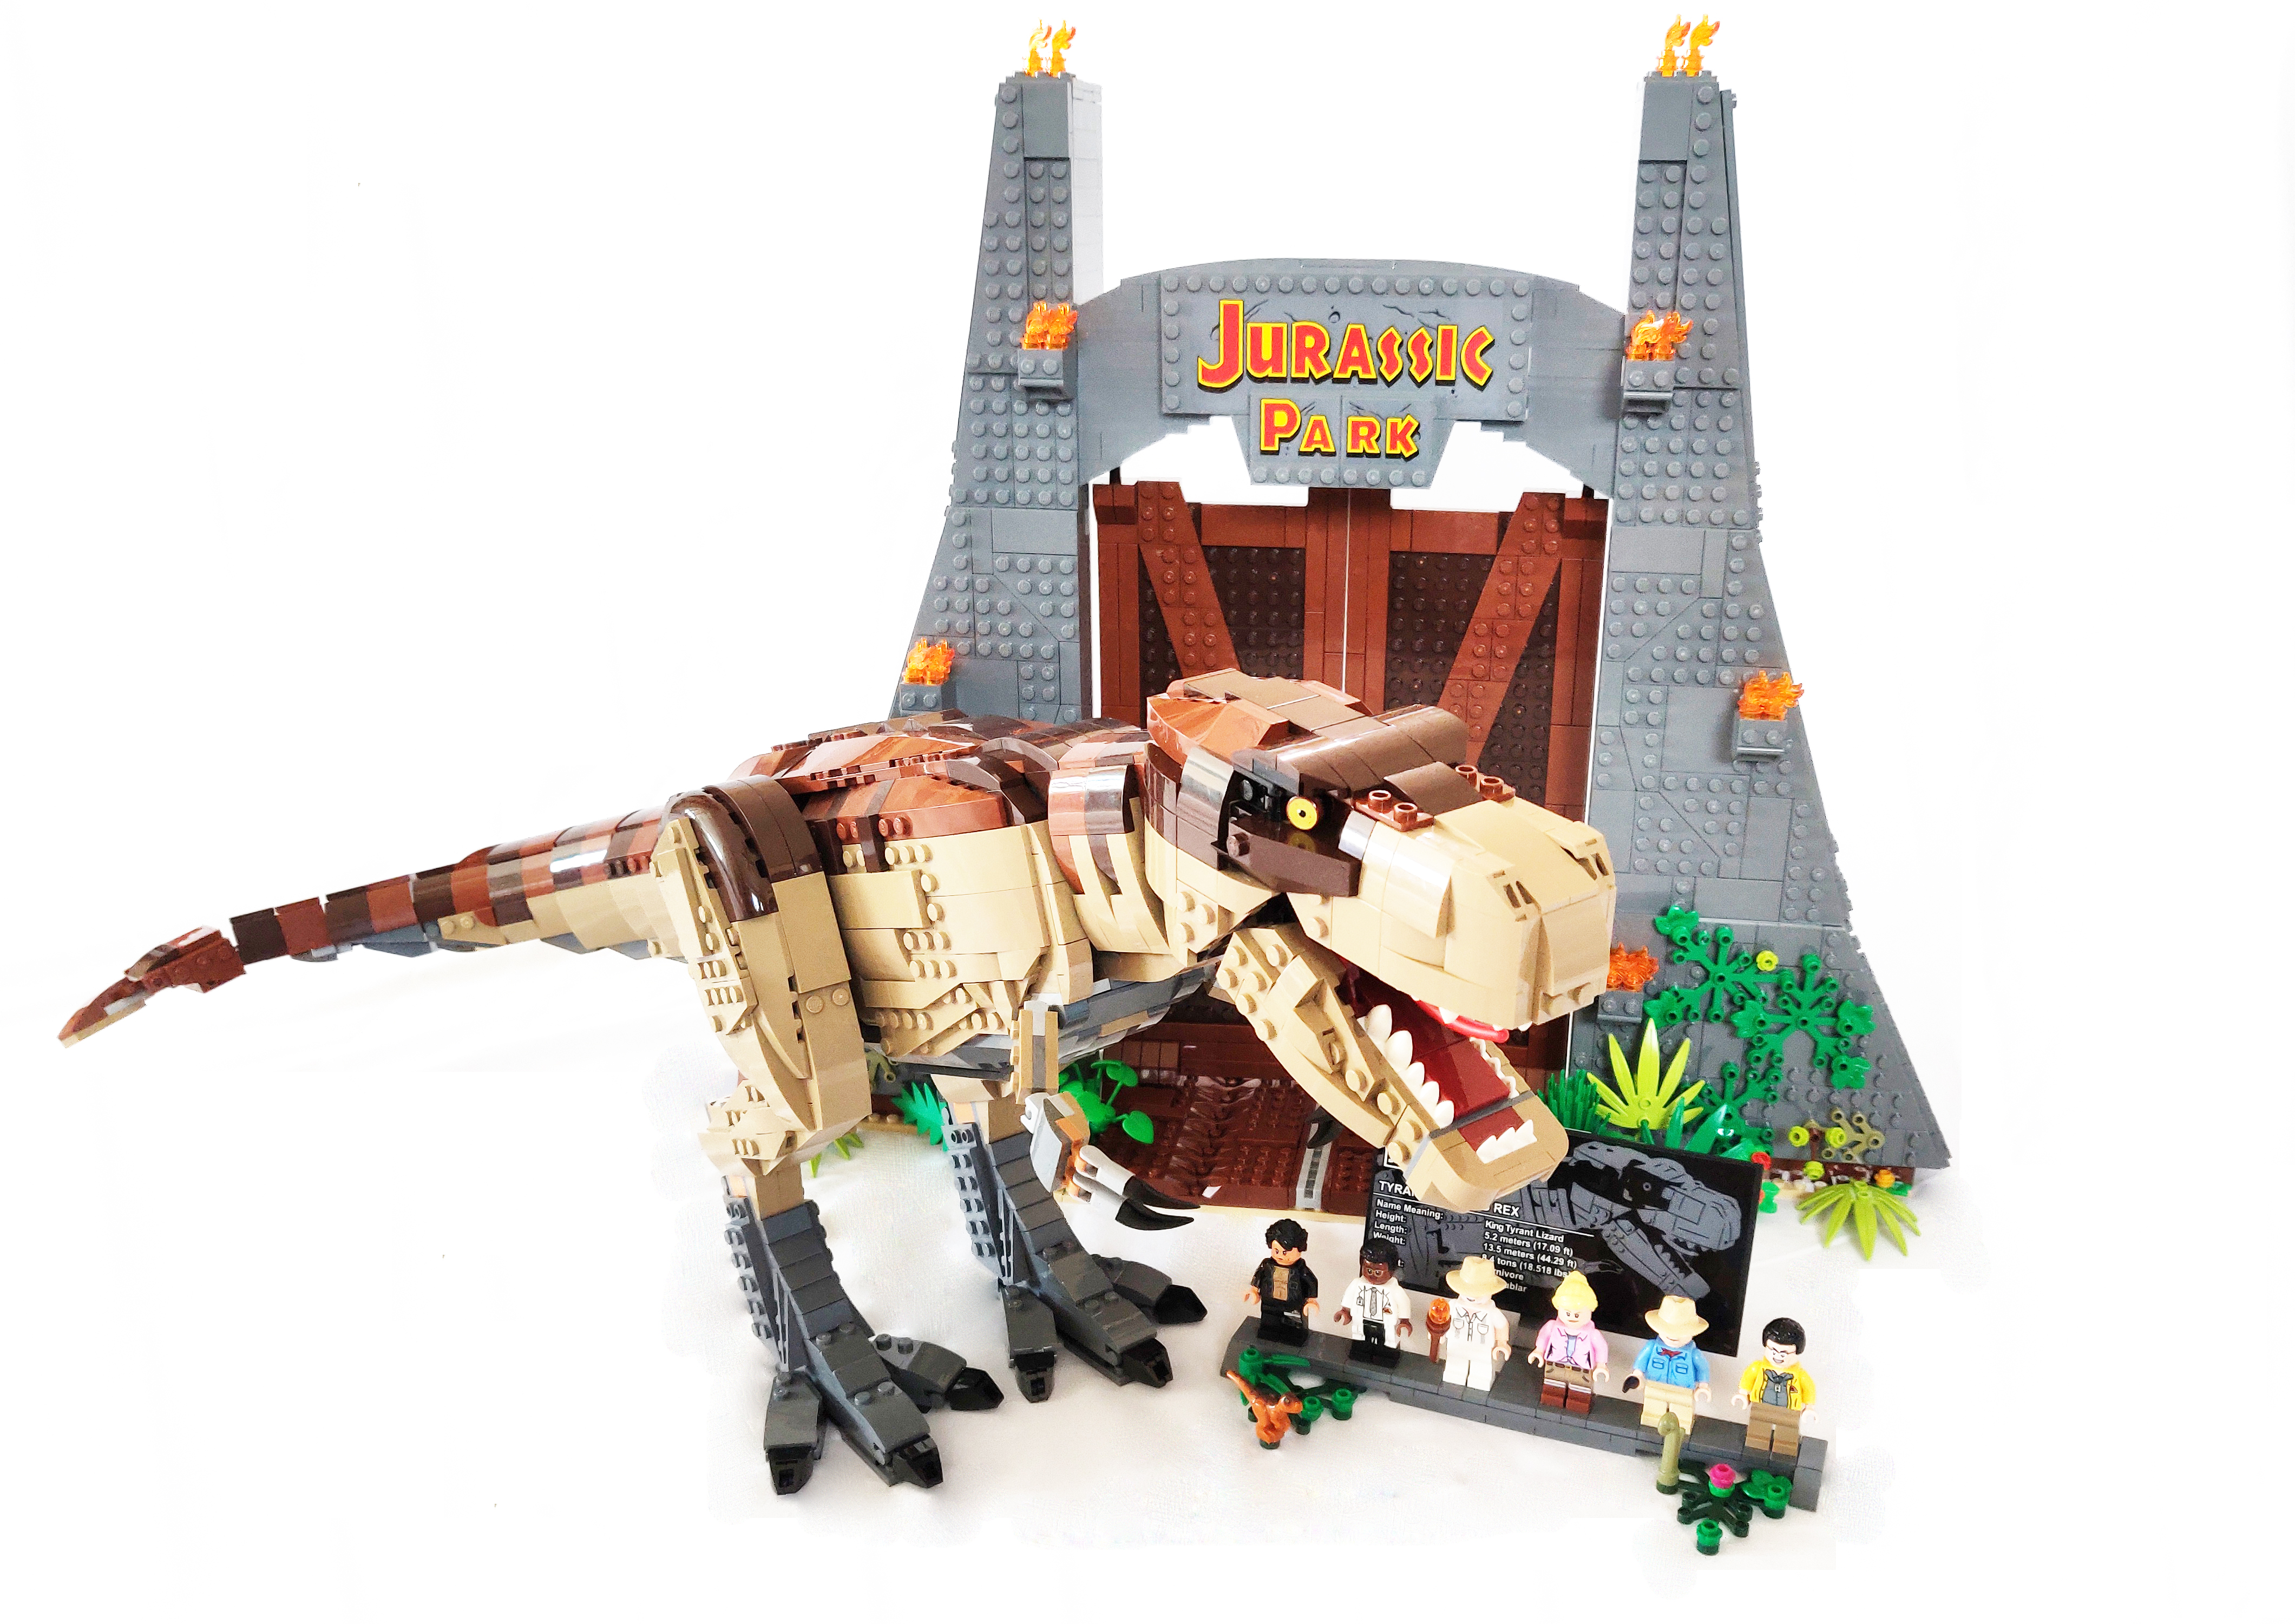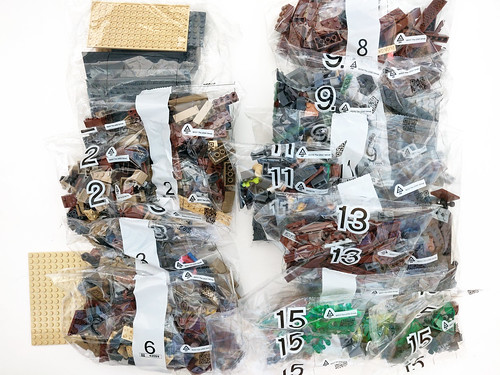
A short while ago, LEGO announced the LEGO Jurassic World Jurassic Park T. rex Rampage (75936) and there was a divide among fans of how the set came out. We were lucky enough to receive a copy of the set for a review and here are my thoughts of it. First off the set contains 3,120 pieces and retails for $249.99 which comes out to about $0.08/piece. The contents of the box include a box filled with bags along with two large instruction booklets and the sticker sheet. The rest of the bags are just dumped into the outer box itself.

Instruction Booklets
One thing to note with the instructions is the first couple of pages which goes into detail about the characters’ bios and some details about the set. There’a also a short interview with LEGO designer Mark Stafford and graphic designer Casper Glahder.
Minifigures
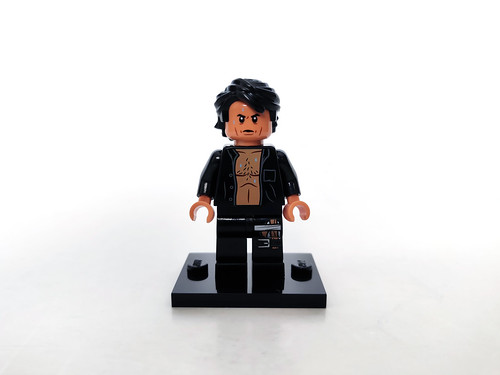
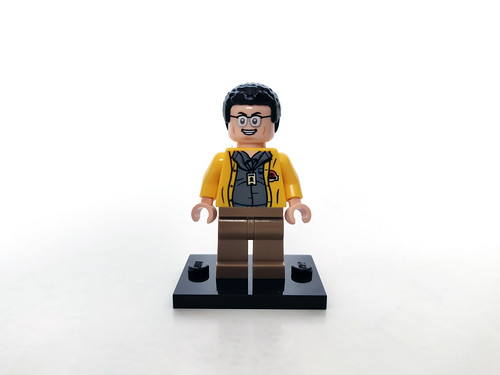
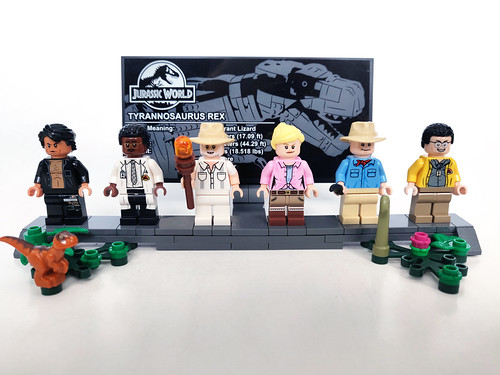
There are six minifigures that are included with this set and they are Ian Malcolm, Ray Arnold, John Hammond, Ellie Sattler, Alan Grant, and Dennis Nedry.
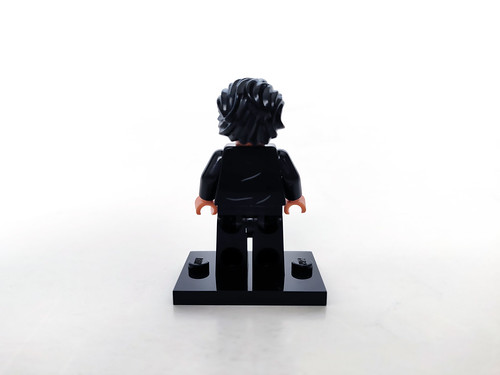
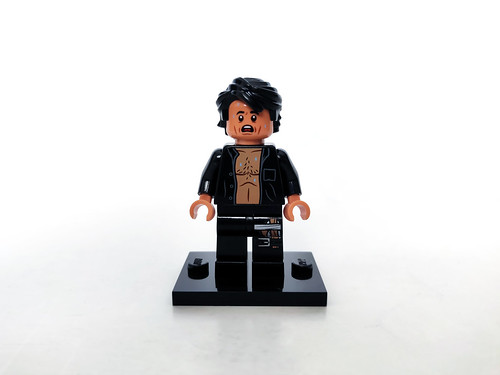
Ian Malcolm is probably on top of a majority of fans with this version of the character which is different from the one in the 2018 Bricktober set. For this one, we have the open black shirt which exposes his chest complete with hair on it. One of the legs has a tourniquet wrapped with belt from when he was injured during the T.Rex attack. He has a double-sided head with a stern look on one side and a scared expression on the other. Both sides also has some sweat rolling down his face.
Ray Arnold is dressed in his lab coat that has printing of his badge and the Jurassic Park logo. The legs are dual molded with the bottom of his lab coat. He has a double-sided head showing a content expression on one side and a scared look on the other. One thing that is missing from the printing is his cigarette.

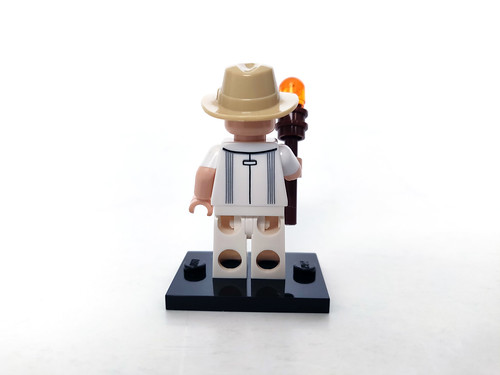
John Hammond is in his white shirt and pants with a tan hat. He has a single-sided head showing a happy expression. His accessory is his amber-tip cane.

Ellie Sattler is dressed in her pink shirt that is tied in the front and brown shorts. She has a double-sided head with a confident expression on one side and a scared expression on the other. Everything about her is the same as in the Jurassic Park Velociraptor Chase (75932) except that this version has a ponytail.

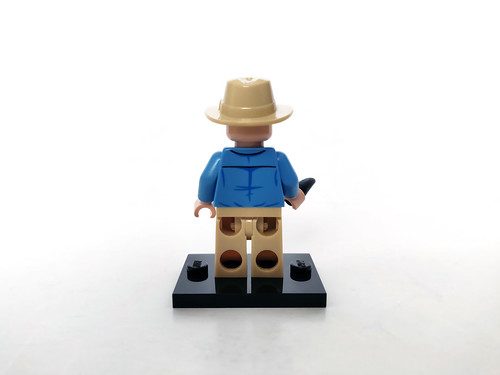
Alan Grant is also the same minifigure as in the Velociraptor Chase. He has his iconic blue shirt with tan pants. He only has a single-sided head with a smile. His accessory is a claw piece to represent the raptor claw fossil that he keeps on him.

Finally we have Dennis Nedry who has a gray jacket with his badge in the front while also wearing the yellow rain jacket that is complete with the Jurassic Park logo on the back. He has a double-sided head with a sinister smile on one side and the other being sprayed with the Dilophosaurus venom.
Build
Before we get to the main builds of the set, I want to take a look at the minifigure display stand that LEGO has included with this set. It has six slots for the minifigures and the front has some plants along with a baby dinosaur. The placard has a large UCS-style sticker which shows some facts about the Tyrannosaurus Rex. I know that this is technically a Jurassic World set but the logo on the top left corner seems off to me. Since this is a Jurassic Park set, I wish that it had the JP logo instead.
The first instructions booklet goes into building the T. Rex. The first set of bags builds the torso that is basically stacking bricks up. You’ll notice near the neck area that there’s a green frog in there. That is because you have to fill in the gaps with frog DNA. There are some click hinges which are used to support the neck and at the end of the first bags, we have a general shape of the neck created by curved slopes on the SNOT plates.

The second set of bags are used to fill out the rest of the body. Like with the neck, there are a lot of SNOT plates and bricks used for curved pieces to complete the torso. The last part for the bags are for the two tiny arms which are on ball joints at the shoulders and elbows.

Bags 3 and 4 are used to build the legs of the Rex. At the hips, there is a gear mechanic that has enough friction to balance the Rex. This is actually pretty genious idea and it works great. There are a couple of ball joints on the ends of the mechanic to attach to the torso. There is ankle movement as well as on the feet to spread the toes if needed.

The tail is made up of ten segments and they all use ball joints to connect to each other. They have a similar build between them but none of them are the exact same as they have to gradually get smaller until it gets to the tip of the tail.

Bag 7 is used to build the head and like with the rest of the body, it uses a number of SNOT bricks for the foundation. More curved pieces are then used to give the shape of the head. Another Easter egg here is the pink 1×2 plate for the brain. The eye are on printed 1×1 round tiles that connect to a hinge to give a sunken look to them. The head connects to the neck using a ball joint but one problem here is that you can raise the head up but it won’t stay in position. The mouth is on some hinges so it is able to open and close with ease.

After the T. Rex is built and you’ll find that it is massive and very fun to play with. I took a short break from building just to pose it around it in various positions.

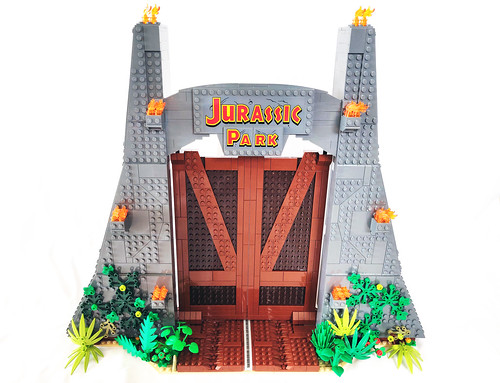
Now that the T. Rex is done, we jump into the second instruction booklet to build the Jurassic Park gate. Bag 8 is mainly used to build the foundation of the gate which uses a lot of plates. There’s a track in the middle for the electricity that goes to the tour vehicles of the park (not included).

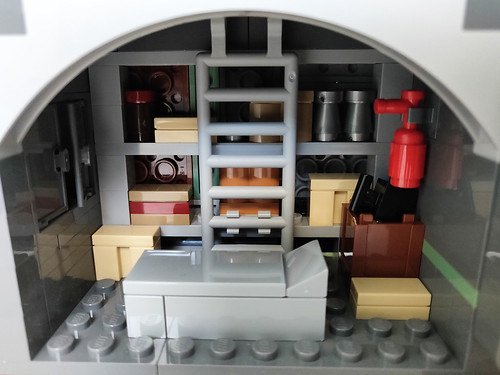
Bag 9 is where we get our first two scenes that are implemented on the back side of the gate. The lower level is the emergency bunker area of the visitor center and it has some supplies on the walls and a bed in the middle for Malcolm.
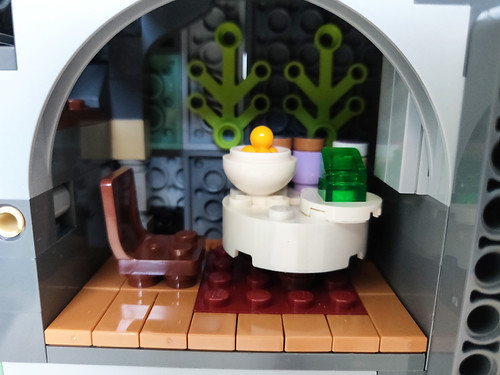
Above that area is a small dining room with a table filled with cookies, the Jell-O represented by a trans-green slope, and some ice cream complete with a spoon.

The next set of bags are used to create the scene for the power shed scene for the lower level on the opposite side of the gate. It only has 8 of the 12 security systems on the main power grid and it uses trans-green or trans-red plates to show if they are activated or not. Above the area are some black pipes that Malcolm instructs Ellie to follow to get to the power grid.
One other feature here is a pretty gruesome one, even for LEGO standards, however I do like the inclusion of it. Between the fence piece is a brown clip which is used to represent Mr. Arnold’s arm after it was ripped off by the raptor.
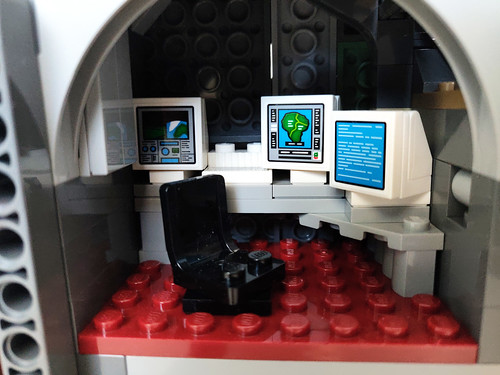
Above the power shed is the control room. It is basically a desk with a chair, printed 1×2 keyboard tile, and three stickered monitors. The monitors show some of what was shown in the movie including the lines of code, the map of the park, and the weather satellite.

For Bag 11, we go back to the opposite side of the gate again. We’re pretty much at the top of the gate and here we have a mudslide and the Barbasol shaving cream can represented by a blue 1×1 round brick and a red nipple piece. The rest of the parts are for the side covering of the gate as well as the front panels.

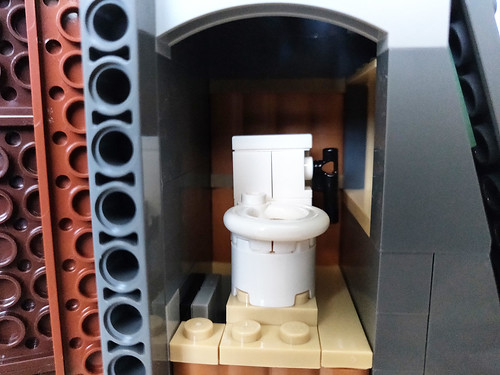
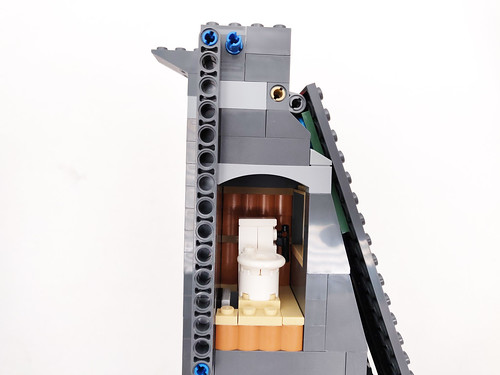
Next up, we head back again to the other side to build a toilet seat. This is to represent the one that Donald Gennaro runs to in the shack during the T. Rex attack when the power went out. I’m not sure why this scene was included considering that Gennaro wasn’t even included as a minifigure.
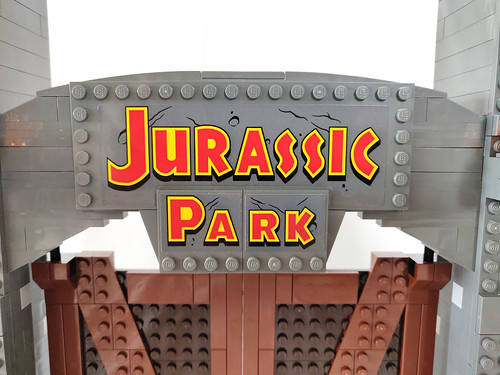
Bags 13 and 14 are used to build the two gate doors. is next and they are massive. There is a gear mechanism around back to open and close the door. This actually works really well as both doors are controlled by turning the gear in the middle. We also build the Jurassic Park name plate in the front of the gate which is made up of three stickers on plates.
We also have the dinosaur nest with some broken eggs right next to the middle gears. I assume this is the raptor nest that Grant finds in the jungle after the T. Rex attack.

Finally for the last bag, there are parts to build the torches that go on the gate facade. There are also a variety of plants that are growing on the lower part of the gate which is nice. These were actually a little annoying to put on as the instructions weren’t too clear on where to put them.

Results
Since I am a huge Jurassic Park fan, I did really enjoy building the LEGO Jurassic World Jurassic Park T. rex Rampage (75936). Even if LEGO didn’t sent this set in for review, it would’ve been a first day purchase for me. Both builds were very enjoyable but I liked the T. Rex build just a bit more even though there are similar building techniques throughout especially on the legs and tail.
The Jurassic Park gate looks great on the front side and the scenes on the back give it some details that fans would appreciate. One thing I don’t get is why LEGO included the toilet seat. I get that it was part of the scene with the T. Rex but the lack of a Gennaro minifigure is kind of a bummer. Speaking of the minifigures, I feel the selection was good. I also would’ve like to have variants of Lex and Tim as well.
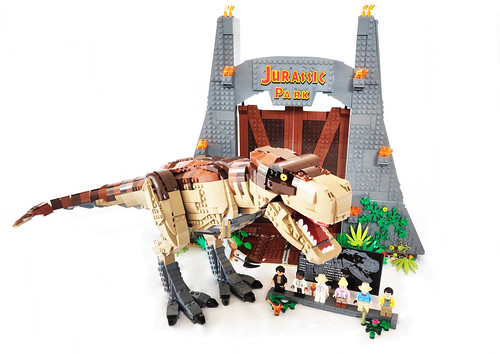
One other thing that fans noticed when the set was first revealed was that there was no Ford Explorer or the Jeep included. From what I’ve read online, one of the reasons was licensing issues and LEGO didn’t have enough time to get it settled before the set was produced. Who knows, perhaps we could see them in a future set later on down the line.
All in all, if you’re a Jurassic Park/Jurassic World fan, I would highly recommend this set. It is still currently available on Shop@Home for VIPs and to the general public on July 1.

Thank you to LEGO for sending in this set for me to review. The content above represents my own opinion and not the company. Review sets sent in does not guarantee a positive review.
When you make a purchase or, sometimes, carry out some other action as direct result of clicking on a link at The Brick Fan, we will receive a small commission.
The Brick Fan is a participant in the Amazon Services LLC Associates Program, an affiliate advertising program designed to provide a means for sites to earn advertising fees by advertising and linking to Amazon.com. As an Amazon Associate I earn from qualifying purchases.
We partner with Rakuten Advertising, who may collect personal information when you interact with our site. The collection and use of this information is subject to the privacy policy located here: https://rakutenadvertising.com/legal-notices/services-privacy-policy/
